Sindh cuisine
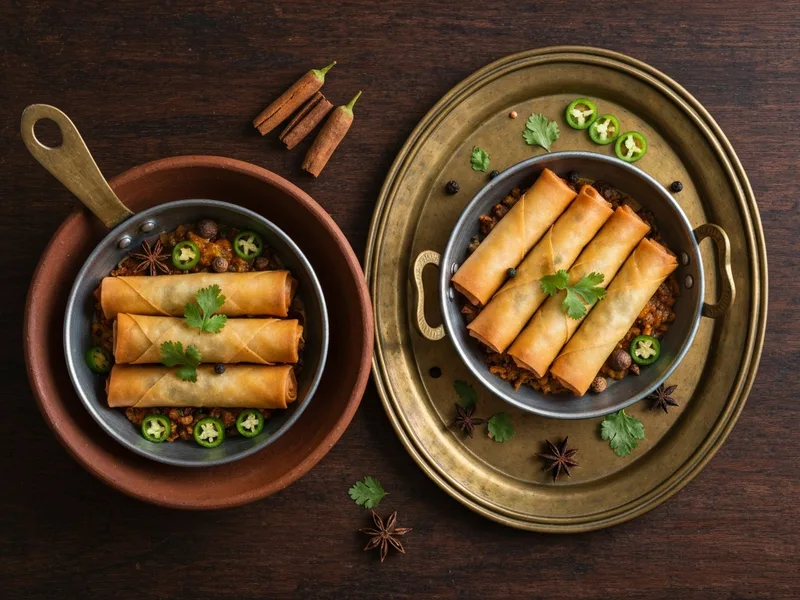
Pakistani Spring Rolls
Pakistani Spring Rolls is a traditional Sindh Pakistani dish. Crispy golden rolls with a halal chicken and vegetable filling — a Pakistani Chinese staple that shows up at every family dawat, school canteen, and street-side Chinese stall from Karachi to Lahore.
Every Pakistani household has a spring roll story. A khala (aunt) who made 200 for Eid. The roadside stall where they came out of the oil faster than you could eat them. The first time someone's filling leaked into the oil and they learned why you must — MUST — cool the filling completely before wrapping.
When Chinese cooks brought the technique to South Asia, it lost its seasonality but gained crunch, chicken, and a fierce loyalty following. The Pakistani version has two absolute rules: no plum sauce (that's Chinese, this isn't), and the filling must be DRY. Wet filling makes soggy rolls and soggy rolls are a personal failure. We will not let that happen to you. The technique is simpler than it looks — once you've made one roll, you'll find a rhythm and knock out a tray in 20 minutes. These freeze beautifully (freeze before frying) and produce fresh spring rolls on demand for up to 3 months.
Ingredients
Instructions
- MAKE THE FILLING: Heat 2 tablespoons of oil in a karahi (wok) over high heat. Add minced garlic and fry for 30 seconds until light golden. Add the julienned cabbage and carrot. Stir-fry for 2-3 minutes — they should wilt slightly but retain a little crunch. Add the shredded chicken and spring onion. Pour in the soy sauce and add the black pepper. Toss everything together for 1 minute. Taste and adjust salt — remember, soy sauce is already salty. HINT: The filling should look slightly dry after stir-frying. If there is any liquid pooling at the bottom of the karahi, keep cooking on high heat until it evaporates completely.
- COOL THE FILLING COMPLETELY: Spread the filling out on a large plate or tray. Leave it to cool at room temperature for at least 30 minutes, or speed it up in the fridge for 15 minutes. WHY? Hot filling creates steam inside the wrapper, which makes the wrapper soggy and weak. A weak wrapper tears when you roll it and definitely tears in the hot oil. This is the step most impatient cooks skip — and it is the single biggest cause of leaky, limp spring rolls. Do not rush this step.
- MAKE THE SEALING PASTE: Mix 3 tablespoons of maida with just enough water to make a thick, smooth paste — aim for the consistency of school glue or thick cream. This paste is your welding material. Keep a small bowl of it next to you while wrapping. Also prepare your wrappers: separate them gently (they stick together when frozen) and keep the stack covered with a damp kitchen towel at all times. Even 3 minutes of exposure to air will dry them out and make them crack.
- ROLL THE SPRING ROLLS: Lay one wrapper on a clean dry surface in a diamond position (one corner pointing towards you). Place 2 tablespoons of cooled filling in the lower third of the wrapper — spread it into a horizontal log shape, not a blob. Fold the bottom corner up over the filling. Fold in both side corners. Roll upward firmly, keeping the roll tight. Before completing the final roll, brush the top corner generously with the flour-water paste. Press the seam firmly to seal. The roll should feel firm, not loose. Set aside seam-side down. Repeat until all filling is used.
- HEAT THE OIL: Pour oil into a karahi or deep pot to a depth of 10 cm. Heat over medium-high heat. To test if the oil is ready: dip the tip of a wooden spoon or chopstick into the oil. If small bubbles fizz around it immediately, the oil is at roughly 175°C — the right temperature. WHY this temperature? Lower and the rolls absorb oil and turn greasy. Higher and the wrapper browns before the filling heats through. A thermometer is ideal; most Pakistani home cooks just use the chopstick test. HINT: Never leave hot oil unattended. It can reach smoking point and become a fire risk.
- FRY IN BATCHES: Gently lower 4-5 spring rolls into the hot oil using a chamcha (ladle) or tongs — do not drop them from a height as hot oil will splash. The rolls should sizzle immediately. Do not crowd the pot — overcrowding drops the oil temperature and results in greasy rolls. Fry for 3-4 minutes, turning occasionally, until deep golden brown all over. The colour should be a rich, uniform amber — not pale yellow (undercooked) and not dark brown (overcooked and bitter).
- DRAIN AND SERVE: Remove the fried spring rolls with a slotted spoon and lay them on kitchen paper to drain. Do not stack them immediately — stacking while hot traps steam and softens the crust. Let them rest for 1-2 minutes uncovered before serving. They will be screaming hot inside — warn anyone at the table to wait 30 seconds before biting in. Serve immediately with chilli garlic sauce — the bright red one available from Shan, National, or Knorr. Ketchup also works. Never plum sauce — that's a different cuisine tradition entirely.
- FREEZE FOR LATER (OPTIONAL): This is the smartest move. After rolling (before frying), place the rolls on a baking sheet lined with paper, not touching each other, and freeze for 2 hours until solid. Then transfer to a zip-lock bag and store for up to 3 months. Fry directly from frozen — no thawing needed — for 5-6 minutes at slightly lower heat (160°C) so the inside heats through. This means you're always 10 minutes away from fresh spring rolls. You're welcome.
Chef's Secrets
- The number one mistake: wrapping with hot filling. The steam softens and weakens the wrapper from the inside. Always cool filling completely — minimum 30 minutes at room temperature.
- Do not use more than 2 tablespoons of filling per roll. Overstuffed rolls burst open in the oil. The temptation to pack them full is real — resist it.
- If you find your wrappers cracking when you fold them, they've dried out. Brush the cracked areas gently with a wet finger to rehydrate slightly, or simply double-wrap those rolls (two sheets instead of one).
- For a crispier result, fry twice: once for 2 minutes at medium heat to cook through, then rest for 5 minutes and fry again at high heat for 1 minute to crisp the crust. This is the restaurant method.
- Spring roll wrappers and samosa pastry (patti) are NOT the same thing. Spring roll wrappers are thinner, more delicate, and made from wheat starch. Using samosa pastry will give you a thicker, doughier result — still edible but not the crisp, translucent crunch you want.
Common Questions
How long does Pakistani Spring Rolls take to make?
Total time is 1h 10m — 45m prep and 25m cooking.
How many servings does this recipe make?
This recipe makes 6 servings, and is rated medium difficulty.
Which region of Pakistan is Pakistani Spring Rolls from?
Pakistani Spring Rolls is from Sindh, Pakistan — one of the country's most distinctive culinary traditions.
What do you serve with Pakistani Spring Rolls?
Serve hot with chilli garlic sauce and ketchup. Part of a Pakistani Chinese spread alongside Chicken Corn Soup and Fried Rice. Also works as a dawat (party) starter — make ahead and freeze, then fry fresh as guests arrive.
Goes Well With
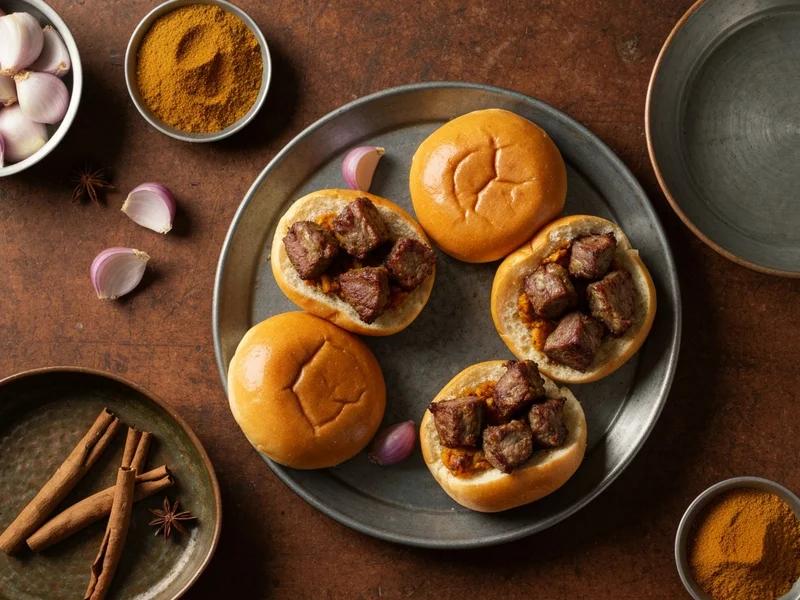
Bun Kebab Karachi Style
Karachi's original street burger — a spiced lentil patty tucked in a bun with sweet-tangy chutney, egg wash, and raw onions. The 50-rupee meal that punches above its weight.
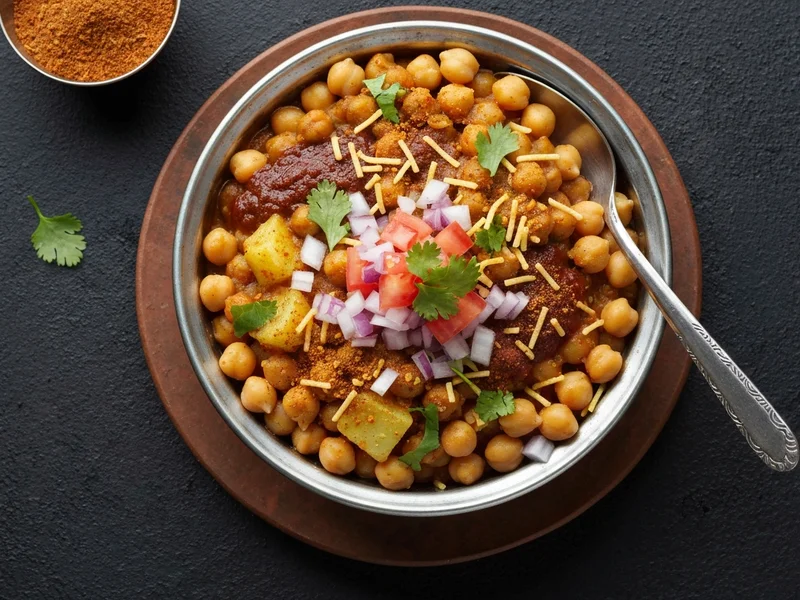
Karachi Chana Chaat
Karachi Chana Chaat is the city's most beloved street snack — spiced boiled chickpeas tossed with crunchy onions, tangy tomatoes, tart imli (tamarind) chutney, cool dahi (yoghurt), and a snowfall of masalas. Every bite is simultaneously sweet, sour, spicy, and salty — a flavour explosion that Karachi has made its own.
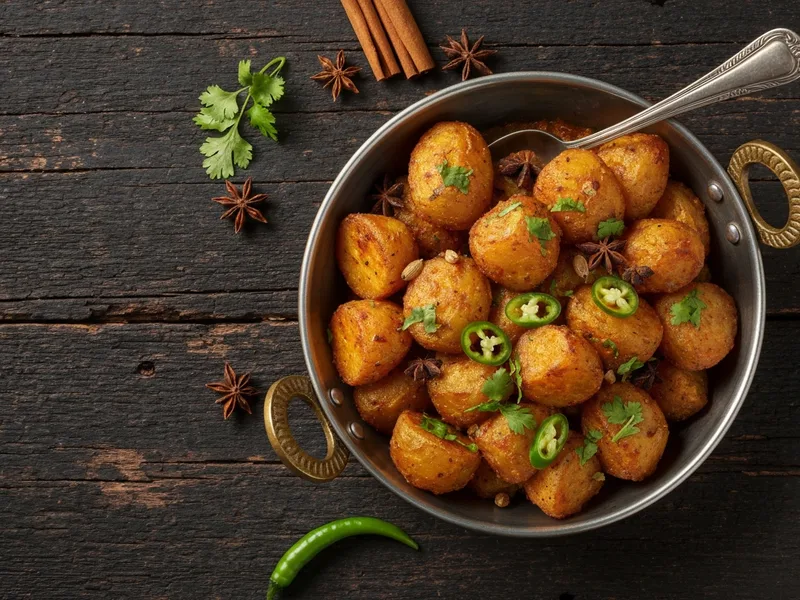
Aloo Tuk (Sindhi Double-Fried Spiced Potatoes)
Thick potato slices that go through two rounds of frying — first to cook through, then pressed flat and fried again until shattery and golden — then immediately tossed in a fierce spice mix of amchoor, red chilli, and chaat masala while still blazing hot. The result is a snack that is simultaneously crispy, soft inside, sour, spicy, and completely addictive. You will eat them faster than you can fry them.
What Cooks Are Saying
Really good recipe. I reduced the chilli slightly for the kids and it worked perfectly.
I've tried many recipes for this dish but this one is the best by far.
Nice recipe. I substituted one ingredient and it still came out great.
Leave a Review
Tried this recipe? Share your experience — your review helps other cooks.